Newsletters
In this article:
Import and tag contacts
Before you send a campaign, you'll need to:
-
Import your contacts
Upload lists with email addresses of your customers and subscribers.
-
Add tags to segment your contacts
Tags will be how you select which contacts you're sending your campaign to.
If you've done these steps, then you're ready to email!
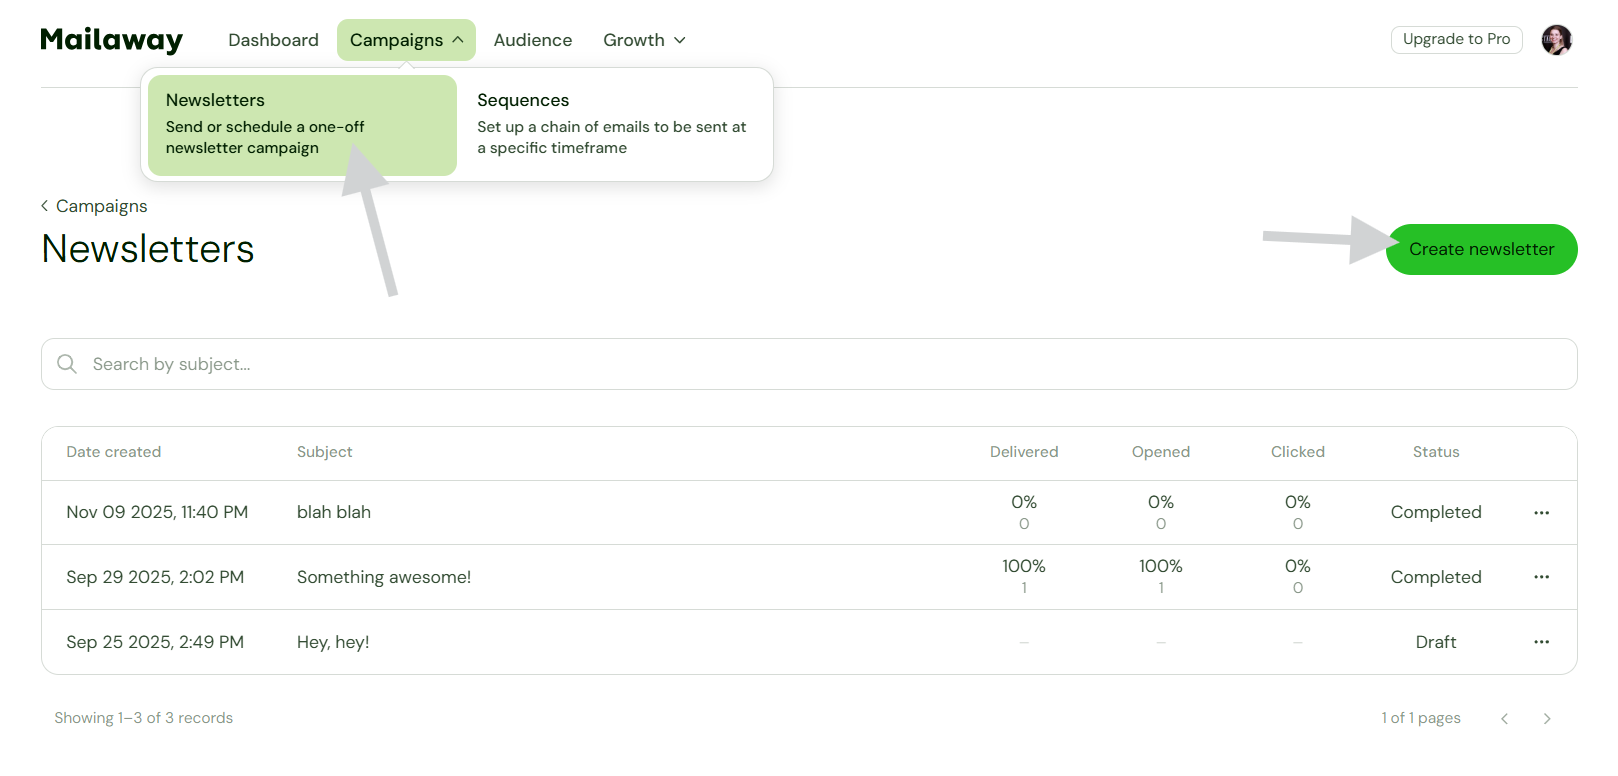
Create a newsletter
To create your newsletter and email design, you'll go to Campaigns and select Newsletters. Then select Create newsletter.
Newsletter details
The Newsletter details include the following:
-
Sender
Choose the sending email address. You'll have a Mailaway address, and you'll see any custom domains you may have connected in Settings.
-
Subject line
This text will be the email subject line.
-
Preview text (optional)
This text will be the preview shown following the email subject.
-
Email body
You'll add your email body text in the editor field on the right.
💡TIP: There are icons to preview what your email content will look like on mobile and in dark mode.
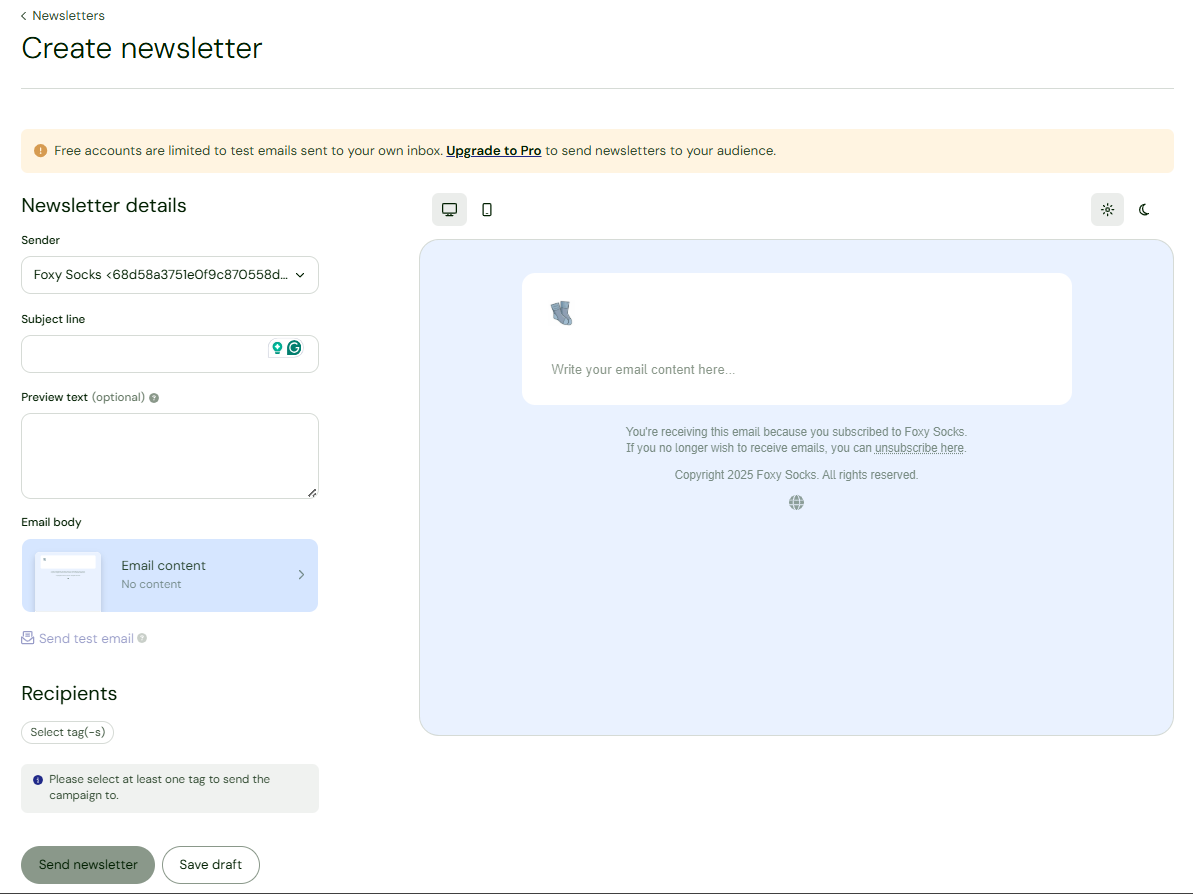
Send test email
Wondering what the email will look like in your subscriber's inbox? See for yourself! Send a test email, and it will arrive at the email address you used for signup.

If you close the tab or window when checking the test email, be sure to hit Save draft. That way, your work will be there when you come back.

Select Recipients
You'll use your previously added Tags to select which recipients you want to target with your campaign.
Click Select tag, and search for the keyword. You can add as many tags as you'd like.

You'll see the total number of recipients shown after selecting tags.